Monday, December 24, 2018

G for Giant gingerbread kids


I’m not sure if we ever made this recipe before. I think we had, but I cannot remember exactly. I do know that we made gingerbread people in the past though so there is a good chance we have used this recipe.


it was an easy enough recipe to make, basically just mix it all together. one thing it said to do that I don’t remember ever doing was roll the dough out on a kitchen towel, at first I was like “What?” but I went ahead and did it because it told me too, I found that it really did make it easier to lift the cookies off the counter.


I wasn’t a huge fan of my cookie cutter, the arms were too thin so they kept breaking off and I would have to push it back together with hopes that it wouldn’t separate while cooking. I tried using a knife to gently ease it out and while it worked most of the time I still lost a few arms. I really miss our gingerbread cookie cutter I had as a kid with its fat arms and legs that never broke off. it may have looked more simple but its was actually a cuter cookie with less problems then my more modern cookie cutter.


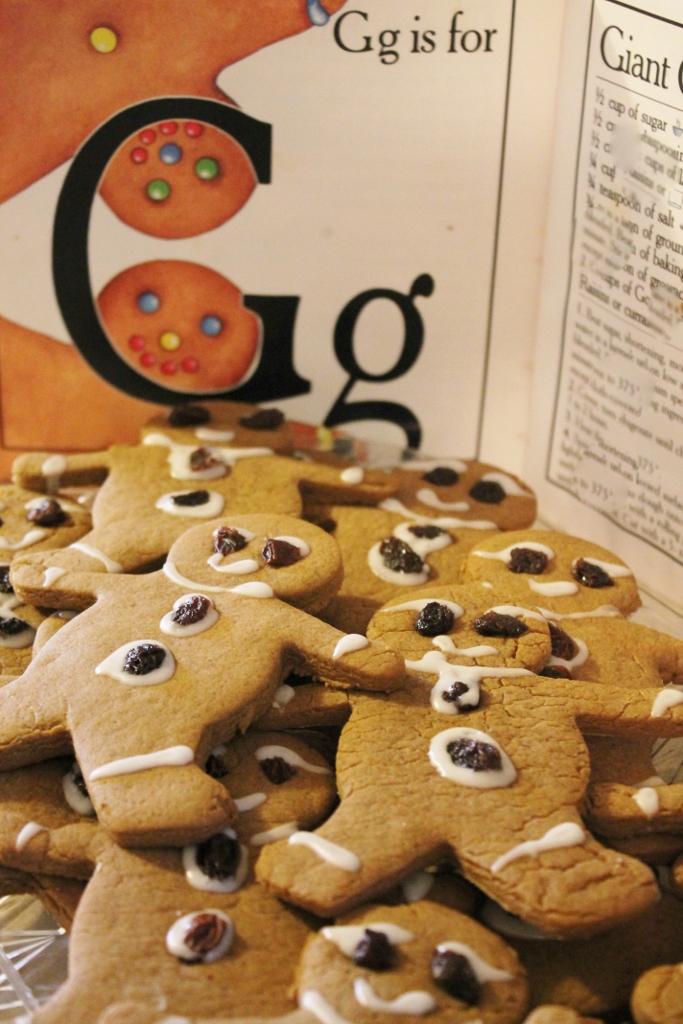
the recipe called for the cookies to be decorated with raisons or currents, even though in the picture in the book it appears to decorated with chocolate candies. so I went with the directions using raisons.
the funny thing is the raisons were so large they took up most of the poor ginger kids face, I tried to so through and pick out the smallest raisons before deciding to simply cut the raisons in half. which worked much better.
my cookie cutter must be smaller then what they called for because it made several more cookies then they said but that was okay. they said it would make 11 cookies with a 5” cutter I have no idea what size mine is its bigger then they rest of my cutters though so I thought it would make about a dozen it made 16.


the flavor was nice when they were warm but even better when cooled they had a good ginger flavor and I liked the amount of molasses in them.
my decorating skills leave a bit to be desired but I figure it doesn’t really matter what they look like as long as they taste good. which they did and they only got better as the days went on. at least until day 3 then they were all gone, but I bet they would have tasted good up to a week later.

Wednesday, December 19, 2018

F for Fudge Brownies


these were actually really good! not that I doubted it for a second that they wouldn’t be. but this is one of the recipes I had not made before.

my niece was over and all for helping me make this latest recipe. its always a lot of fun to make things with another person. we have a pretty good system for baking together since we have been doing it for quite a few years now.
this recipe was a slightly more complicated brownie recipe then I usually make. it had us melt chocolate chips into butter. they said to do it in a pan on the stove top, but I know Chocolate can be a bit on the persnickety side when it comes to melting. I didn’t want to over melt it and have the chocolate get that strange grainy bits in it so I took the liberty of using the double boiler method which is a slower but more precise method.
my niece really liked this way of doing it. I let her do the stirring while the chips melted.


when they finished I again made her wait till they cooled a bit, though not as long as when we made the Chocolate chip cookies. because warm Brownies are pretty much awesome.
they turned out to be very rich and extremely chocolately.


and for a final touch of course we had to add the ice cream. which just about put it into desert overload. I mean overload in a good way of course..

Thursday, November 8, 2018

E for elaphant ears!


my mom used to make these for us all the time when we were kids, only she didn’t quite follow the directions, she got as far as the rolling into a log then she would slice them up into probably a dozen pieces and bake them into the small cookies.
now I will point out that I did mess up a bit on these, but I really didn’t feel like re-doing them over a simple mistake. I forgot to sprinkle them with cinnamon and sugar before putting them in the oven. they probably would have had a slightly more finished look if I had done that but all in all they were still good and I am counting them as the E.
and yes I realize my finished product is not exactly beautiful, but they did taste good and that for me is all that mattered.


I never really understood why they were called Elephant ears till I read the recipe as an adult.
this recipe only makes four biscuit like cookies. after the slicing the roll into four equal parts your supposed to flatten them into six inch circles. these are supposed to be large cookies, not small which is why they call them elephant ears, because they are big and round like an elephants ear.


I kind of get why my mom skipped the flattening part. it tells you to do it with your hands and its not exactly easy, it takes a lot of time, its messy., and breaks apart. other people may be better at this then I am, but alas I am not very good at flattening. the flattening also doesn’t change the flavor much from the slicing my mother did, so if you just wanted the flavor and didn’t care about them being small then by all means I suggest making smaller cookies. however the whole point of them being called Elephant ears is they are large! and come on what could be better then an extra large cookie especially if its the size of your head.

Sunday, October 7, 2018

D for delicious drumsticks

lets just start off with I am not a fan of dark meat, I just care for the flavor or the texture so really to rate this recipe I am not a good choice. I knew this was not something I was going to be a fan of and I was right.
when got to this recipe I was glad to see one of the stores had drum sticks on sale. knowing that I wasn’t going to really like this recipe I didn't want to put a lot of money into it. so I off I go to the store buy the drum sticks come home, a ten minute drive, open the drum sticks and am met by a revolting smell, that had me jumping back gagging. the meat was spoiled. not exactly the best way to start a recipe I was already not looking forward too. needless to say I did not use that meat. I brought back to the store. after that I didn’t think I could stomach being around drumsticks for a while so I put off making these for a few weeks.
good news is the next meat I bought was good, and I was able to move forward with the recipe.
this was fairly easy to make, you basically just dip the chicken in melted butter then roll it in the flour mixture then bake.
the coating crisps up in the oven and you have a nice lightly breaded fried chicken effect.
for being something I don’t like it was pretty good I do believe it would have been a bit better if it had more spices in it, such as garlic and onion. but the paprika did do a nice job in adding some flavor.
its probably not something I would make again though I might use it as a base recipe for chicken tenders.


Thursday, September 6, 2018

C for chocolate chip cookies


wow that is three C’s!
Chocolate chip cookies are one of favorite Cookies, yeah I know way to be generic right? but I can’t help it, they are just so good. the way the cookie is chewy and dense at the same time and if its done right the chocolate is always just a bit melty even once its cooled.
of course I already had a favorite chocolate chip cookie recipe, a tried and true one, the rather generic one on the toll house chocolate chips. which is a recipe I had perfected, I bring them to places and tell people that is the recipe I use and they are like why don’t mine come out like that, these are so good, and I of course just shrug because I have no idea why something I make would be better then something someone else made when it is the same recipe. I have heard though that different cooks using the same recipe will always taste different, because everyone has their own techniques. though I must point out the toll house chocolate chip cookie recipe taste pretty much same between myself and my sisters making them. I really think its all in following the direction.

but enough on that and on to this recipe in the book.
I was of course concerned it would not be as good as what I am used to making but I read the recipe carefully and it sounded pretty similar, so hey it would probably be good.
my niece came over for the weekend so I asked her if she would like to help me with making these. she of course was very exited, she loves baking and also is a big fan of Chocolate chip cookies.
so we gathered up the ingredients and got to work.

we bake a lot when she comes over so we have it down a rhythm pretty well of who does what and how to measure, so the work was split fairly evenly between us. that is until we got to the final mixing. this dough is a very stiff dough. so stiff in fact I half wondered if we had accidentally put in too much flour. we had been passing the half cup back and forth and counting out the two and a half cups it called for trying to be careful, but it would have been easy enough to mess up the count the way we were doing it. the dough was so stiff in fact it was impossible to mix with the wooden spoon. I finally gave up and just squished it a whole bunch with my hands to mix it. it kind of reminded me of play dough as I mixed it.
the recipe called for nuts which again I don’t generally put nuts in things, but since it called for them we added pecans. pecans are probably my favorite when it comes to cooking with nuts. once we finally got the dough all mixed it was time to scoop them out.

I was nervous with how stiff the dough was it wouldn’t flatten as they cooked, but they did. though not as much as I had hoped so I squished the second batch down a little only to decide that didn’t really make them any better, so why bother? and didn’t squish anymore of them.
and then came the hardest part. the waiting for every last cookie to be cooked.


normally when we cook something like cookies we are sneaking them right off the cookie sheet the moment they come out of the oven., but this time we had to wait, so I could get some pictures for the blog.
this didn’t go over that well with my niece. not that she was disrespectful or anything but you could see the disappointment in her face when I told her she had to wait.
once all the cookies were baked, and pictures were taken we dug in!
and oh wow these cookies were really good! I didn’t have to worry at all about the dough being stiff, because it worked out really well the centers were slightly more poofed then the outer part of the cookie. they were soft and fluffy and the chocolate chips were melty gooey .
as good as they were I still think I would leave out the nuts next time. but my niece had to disagree with that she really liked the nuts, but either way they turned out really well.


Thursday, August 30, 2018

B for Banana bread


I have always skipped this recipe as I already have a favorite banana Bread recipe. one I have made for years and years that always comes out perfect. its from a Betty Crocker cookbook and if one follows that recipe its wonderful.
the recipe in this book is a bit different and actually a bit easier, not so fussy about when and how things are added. its pretty much wet ingredients mix, then dump in the dry, stir and be done with it. I wasn’t real fond of the dumping in the dry ingredients though I felt as if they should already be mixed before dumping as the time between measuring each of the dry seemed to cause the flour to clump more. whereas I find mixing the dry then adding slowly while mixing saves a lot of time since one is not chasing and squishing out the flour clumps. but that is just me.


once all the flour clumps were successfully removed it was time to add the nuts. now in keeping with the recipe I added walnuts but I must say if given a choice of nuts in a banana bread I would prefer pecans, and better yet I actually prefer it without nuts at all. then it is into the oven to cook for an hour or so.
this once again was an issue, it took significantly longer to cook then the stated time in the book. but I actually think this is something with my oven, I really need to invest in one of those oven thermometers because I have been having this issue with other recipes as well, so it must be the oven not the books.


it smelled heavenly as it cooked and made me want to eat it right away, but I behaved and waited till it cooled. and I must say it turned out pretty good even for having nuts in it.
would I make it again? sure it tasted good, and I am sure it will be just as good without nuts. maybe even a bit more moist. not that this wasn’t moist it actually was. and it top it all off the next day it was sliced and made into banana bread french toast which was pretty awesome but was eaten before even the thought of a picture could be had.

Friday, August 24, 2018

A for Apple crisp

the first recipe in the book is Apple crisp.
we ate apple crisp a lot when I was a child, was it from this book?  I have no idea, but it is something I always enjoyed eating.
one reason we had it a lot is we had a apple tree. the apple’s were not exactly the best eating apples they were a bit on the tart side ( not that that really stopped us from eating them straight off the tree)  but they sure cooked up nicely. so for about a month every year we ate apples till we were sick of them. for only having the one tree it sure produced a lot of apples.
 I miss that tree unfortunately the tree was lost to drought a few years back, but I still remember that tree.


making the recipe was fairly easy, as I do believe most Apple crisp is.
it called for sliced apples, which is something I have never actually done when I made Apple crisp. I always just chunked the apples. but since the recipe called for sliced I use an apple slicer then  using a knife cut each slice into three thinner slices. I find it goes faster that way.<


 the recipe also said I could used peeled or unpeeled apples.   I opted for the unpeeled  because they umm... have more nutrients in them right?   not to mention its a bit faster  and I actually like the peels on apples.
I used a combination of green and red apples,  not for any type of flavor combination but because I had them in the fridge already.
the cook time was a bit longer then the book called for which may have been the type of apples I used (not that I actually have an idea what type of apples I used. just the ones I had.)  or my oven which sometimes cooks slow could have been the reason<

the smell of it cooking was absolutely heavenly, but how can it not be? anything with Apples, brown sugar, cinnamon and butter has smell good cooking.  the hardest part of the whole thing was waiting for it to cool enough to eat!
but it was worth the wait  the flavors were spot on  and the it had just the right amount of crisp to the topping while the apples were soft and perfect as well.

and of course I had to end it all by topping it with Vanilla ice cream! definitely a make again type of recipe.